| Readme: | Short: Planet Blue, skin for MorphOS
Author: Jambalah (Paolo Russo) geepney@hotmail.it
Version: 1.0
Date: 29/8/2011
Requires: MorphOS 2.x, enhanced display for transparency and shadows effect.
Hi everyone!
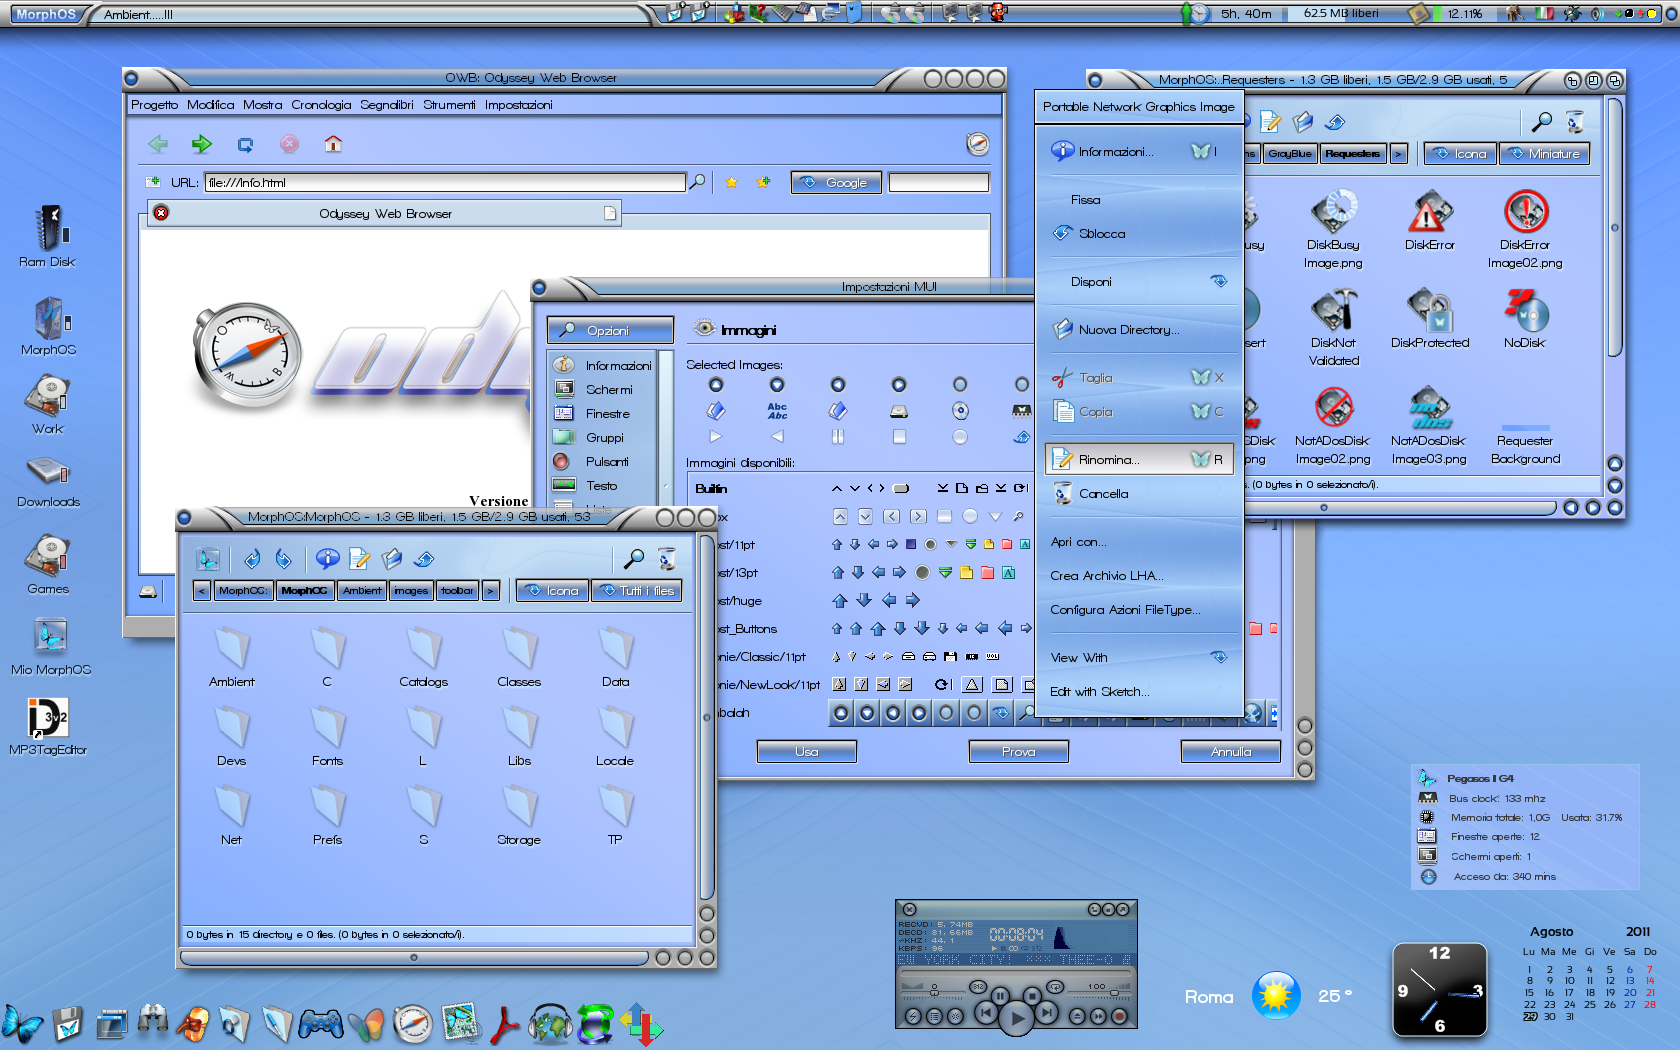
After a not-so-very-long time I realised this new skin!
Well, this is an attempt to create a skin customizing almost all parts of it and this
includes MUI grafics (images in MUI settings), Ambient images (for menus and toolbar)
and a new button frame, without mention four wallpapers in.. MorhpOS style and a couple of
images to use as boot pictures.
MorphOS allows a great customization but... something (graphically) is missing imho: four-state
buttons for windows and MUI (a "on mouse over" feature), possibility to have windows backgrounds
and prop backgrounds indipendent and, about props, a little more customizable (backgrounds frames),
transparency for rounded angle frames (f.e. if you use a rounded frame for a MUI menu square angles
will be diaplayed), shadow for screenbar and some other little things here and there...
Ok, those are particular (not basical, I mean) things and maybe in the future... =)
Installation:
since this skin provides more graphics, differently from the others, you will asked to do a little more
work to install everything, though it's not a big pain.
I divided elements in appropriate directories so you will have:
- BootPictures -
you can put the whole directory in "SYS:Prefs" and then select the image you prefer from there.
- Fonts -
Inside this directory you will find the font called Walkaway.ttf wich I used for the preview image and
the Sansation.ttf, the one I use to use regularly.
- MOSSYS -
inside this directory you will find another two directories: the first is "Ambient" and the second
is "Prefs". Inside the first there is another directory called "images" wich has two directories
"menu" and "toolbar" and three .mbr files. All those elements (the two directories and .mbr images)
have to be copied inside "MOSSYS:Ambient/images" replacing the original files. It's better to do
a backup of the old dirs and files (renaming them f.e.) just in case you wouldn't like the new.
The other directory is "Prefs" and inside it you will find a subdir called "MUIGfx" wich contains
another directory called "Jambalah": inside this last dir you will find the image frames to use with
MUI settings. So copy the whole "Jambalah" directory inside "MOSSYS:Prefs/MUIGFX". This is necessary
because if you copy this dir in "SYS:Prefs/MUIGfx" the images won't be used though they will be
displayed in the MUI settings window.
- Planet Blue -
this is the skin directory and you have to put it in "Sys:Prefs/Skins". Inside, there are dedicated
MUI prefs and you can select them in MUI settings windows, inside "Default Settings" menu.
- STitlebar_Sized -
to draw the screenbar you find on top of Ambient screen there is an element called "STitlebarBackground"
inside the skin directory. When you will going to use it this element is there in a simple form. But if
you want the look you can see in the preview than you have to use one of this graphic element. They come
in different sizes, according to different screens width and they start from 1024x28 to 1920x28, including
1152x28, 1280x28, 1600x28, 1680x28 and 1800x28. If some size(s) is missing.. well forgive me and let me know.
I will provide the missing one. To use one of those, rename the "STitlebarBackground" in the skin directory,
rename the one you choosed and put it in the directory itself.
- SYS -
inside this directory you sill find: "Prefs", wich contains "MUIGfx", wich has "frames" inside. In the last
directory you will find various png images (backgrounds for some elements) and another directory called
"Jambalah". Inside this a directory called "Square" contains the two new button frames I created for this
skin. Copy the whole directory called "frames" (the one with png images and "jambalah" and "Square" directory)
in "SYS:Prefs/MUIGfx". The new button frames should appear in the MUI settings window (trying to select
"frames". If not, they will appear after a reboot.
- Wallpapers -
four wallpapers inside this directory. You can copy it in your "SYS:Prefs" to have them ready to use.
Well, this should be all you have to do to install this skin. It seems a little difficult but it's easier to
do it than to read it. In case of difficult, let me know. But please: read always the read me before to
attempt anything! I'll take no responsabilities for anything if you could erase/damage/forget-to-backup datas
and/or files. Do things with your head though there are not so much difficult things to do ;)
This skin is freely redistributable, usable and modifiable. Just remember of me =D
I really hope this attempt to draw something nice could be appreciate and if something is wrong or missing
please, let me know.
Ciao!
|
 Ambient (150)
 PlanetBlueSkin_1.0.lha